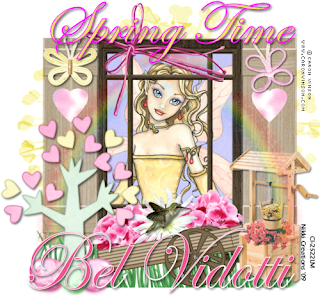
To do this tut you will need working knowledge of PSP.
Supplies:
Tube of Choice: I am using the wonderful artwork of Caron Vinson. To use his work you need a license. You can get one HERE.
Scrap Kit of Choice: I am using the beautiful FTU Scrap Kit called "Into Spring" By Bel Vidotti. You can find it on her site HERE.
Thank you hun!
Font of Choice: I am using Edwardian Script ITC.
Mask of Choice: I am using the wonderful work of Vix. Vix_Mask223. You can get this mask HERE. Under Goodies.
Thank you hun!
Ready? Let's Go!
- Open New Raster Layer 600x600 white
- Open the Into Spring Window. Resize by 75% and paste on canvas.
- Grab your magic wand and click inside your frame layer. Selections-Modify-Expand by 4. add a paper of choice. Selections-Invert-Delete-Selections-Invert. While it is still selected add a tube of choice. Selections-Invert-delete-Selections-None.
- Add the grass element. Resize by 80%- Place on bottom of window sill.
- Add the Rainbow-Resize by 80%- Place on frame. Duplicate- Mirror-Erase parts of rainbow that are on the tube.
- Add Tree01- Resize 70% then again by 70%. Give a drop shadow and place on your tag.
- Add the Wishing well-Resize by 75% then 80%- Add drop shadow. Place on your tag.
- Add Wagon and resize by 60%- Mirror- Place on tag.
- Add Flower02- Resize by 40%- Place in the wagon. Duplicate and Mirror.
- Add Flower01-Resize by 40% and place in wagon.
- Add Bow01- Resize as you would like it and place it on your tag.
- Add any other elements that you would like.
- Add a paper and open your mask in PSP. Go to Layers-New Mask Layer-from Image-Find Vix_mask223. Merge-Group.
Save as png or jpg and your done!
I hope you enjoyed this tut. I would love to see your creations. You can email me them and I will add them to the slide.
Any other resemblance to another tut is purely coincidental.
Written By: Nicole March 31, 2009

No comments:
Post a Comment