

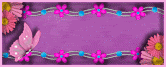
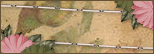
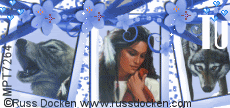
As requested here is the Tutorial to the Tag I made for my header.
For this Tutorial you will need working knowledge of PSP.
Supplies:
Scrap kit of Choice: I am using the fabulous FTU scrap kit by Bel Vidotti called "Alone".
You can find it HERE.
Thanks Hun!
Tube of Choice: I am using the wonderful work of Jamie Kidd. You need a license to use Jamie's art. You can get one HERE.
Mask of Choice: I am using the wonderful work of Zuzzanna's, called zuzzanna_mask32. You can find the Mask HERE.
Thank you hun!
Ready? Let's Go!
Open a New image 500x500 white
Open the Alone51 frame and copy and paste on your canvas.
With your Magic wand click inside your frame layer. Copy and paste a paper of choice. selections-invert-delete-selections-invert
Grab a tube of choice and copy and paste inside the frame above the paper layer Selections-Invert-delete-selections-none
Open the Alone26 element and resize by 85% then b 90%- Place on the side of the frame-layers-duplicate-Image-Mirror
Open the Alone31 and Alone32 elements. Resize them by 20%. Arrange them as you would like them.
Open the Alone14 element and resize by 40%. Place at the top left hand corner of the frame.
Open the Alone17 element and resize by 40% and mirror. Copy and paste it on your tag on the right hand corner of the frame.
Open your Mask in psp.
Open a paper of choice. Copy and paste it over the white background layer. Layers-New mask layer-from Image- find zuzzanna-mask32 Source checked and invert mask data checked.
Merge-group.
Add your name
Add your correct copyright and license information.
Save as png or jpeg.
Your done!
I hope you enjoyed this tutorial. Any resemblance to another tut is purely coincidental. I would love to see your creations. You can email them to me and I will post them up on the site.
Thank you for trying my tut.
Written by: Nicole March 13/09


No comments:
Post a Comment