Tuesday, April 14, 2009

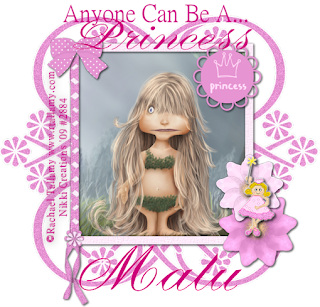
~*~Anyone Can Be A Princess~*~


For this Tutorial you will need working knowledge of PSP.

Written By: Nicole April 14,2009

Any resemblance to another tut is purely coincidental.


Supplies:

Scrap Kit of Choice: I am using the wonderful FTU kit called "Princess" By Malu. You can find it HERE.

Thanks Hun!

Image or Tube of Choice: I am using the wonderful art of Rachael Tallamy. You need a license to use her art. You can get one HERE.
Font of Choice: I am using a PTU Font called Princess.
My supplies which include Princess WordArt. You can download it HERE.
Ready, Let's Go!
Open a new Raster Layer 700x700 white we will resize later.
Open Frame1~Copy and paste on the canvas. No need to resize.
Grab your magic wand and click inside the frame. Selections~Modify~Expand by 3
Open a tube or Image and paste inside the frame. Delete the parts you don't need.
Give your frame layer a drop shadow of 2~2~60~5
Open Flower1~ Copy and Paste on your canvas. Resize as you would like. I resized it by 60%
Open Flower2~Copy and paste it on your canvas as well. Resize as you would like. Then arrange the flowers together.
Open Princess-Journal and resize to your liking. Place it on the top Right hand corner of the frame.
Open a Bow of choice and resize it then place it on the left hand corner of the frame.
Open Princess-Girl and place it on the flowers.
Give all your elements a drop shadow.
Open Doodle1-Copy and paste above your background layer. Move it to your liking~Then Duplicate-Mirror-Duplicate-Flip-Duplicate-Mirror.
Add any other elements you would like.
Add your copyright and license information.
Merge All-Down
Resize your tag by 80% (or whatever you like)
Save as png or jpeg.
Your Done!
'
I hope you enjoyed this tut. I would love to see your creations. You can send me them and I will put them in the slide show.

Wednesday, April 8, 2009

♀Flirt♀ FTU


For this tutorial you will need working knowledge of PSP.

Supplies:
Tube of Choice: I am using the wonderful work of Keith Garvey. You need a license to use his art. You can get one HERE.
Scrap Kit of Choice: I am using the fabulous FTU kit called Pieces of Us, By Claudia. You can get her kit HERE.
Thanks hun!
Font of Choice: I am using Commercial Script BT
My Supplies: 3 Square Template. You can download it HERE.

Ready? Let's Go!

Open my template in PSP.
Open a New Raster Layer 600x600 white
Copy and paste my template on the canvas.
Open the Doodle Stars- use your deform tool to shape and size along the side of the big square.
Open the Flowerbead2- Again using your deform tool shape and side between the two little squares.
Grab your magic wand- Click inside one square and add a paper of choice. Selections-Invert-Delete-Selections-None
Click inside another square and add a paper of choice. Selections-Invert-Delete-Selections-None
Click inside the large square and add a paper of choice. Selections-Invert-Delete-Selections-None
Grab your Magic Wand again and click inside a square- Add a tube of choice. Selections-Invert-Delete-Selections-None
Do this step for the other 2 squares as well.
Open Flower2- Duplicate-Mirror-Duplicate-Flip-Duplicate-Mirror.
Open Flower3- Place where you would like it.
Open Bead2- Place it where you would like it on your tag.
Add your copyright and license information and any other elements you would like.
Save as png or jpeg.
Your Done!

I hope you liked this tut. I would love to see your creations. You can email me them and I will add them to the slide.

Any resemblance to another tut is purely coincidental.

Written By: Nicole April 8, 2009


♥I Love You Mom♥ (FTU)
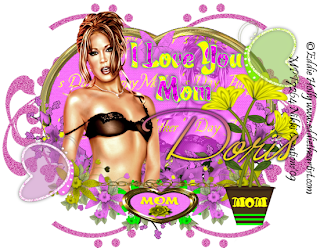

For this Tut you will need working knowledge of PSP.

Supplies:
Tube of Choice: I am using the wonderful artwork of Eddie Holly. You need a license to use his art. You can purchase one HERE.
Scrap Kit of Choice: I am using the FTU kit called Mother's day by Doris. You can find the kit on her site HERE.
Thanks Hun!
Font of Choice: I am using Monika.

Ready? Let's Go!

Open a New Raster Layer 700x700 White
We will resize this later!

Copy and paste Frame1 on your canvas.
Grab your Magic Wand and click inside the frame layer. Selections-Modify-Expand by 4- Add a paper of choice. Selections-Invert-Delete-Selections-Invert
While still selected Paste a tube of choice in the frame. Selections-Invert-Delete-Selections-None
Open the Flower1 Element- Resize by 20% and place on your tag where you would like it.
Open the Flower2 Element- Resize by 20% and place on your tag where you would like it.
Open the Flower3 Element- Resize by 20% and place on your tag where you would like it.
Open Flower Pot2- resize it by 40% and place it on our tag.
Open Both Bling Dragonfly's and resize them by 20%. Place them on your tag.
Open the Bracelet element and resize it then place it on your tag where you would want it.
Open a Doddle of Choice- Paste it above the white background layer. Duplicate it-Mirror-Duplicate-Flip-Duplicate-Mirror.
Add your copyright and license information.
Save as png or jpeg and your done!

Thank you for trying this tut. I would love to see your creations. you can email them to me if you would like and I will add them to the slide.

Any resemblance to another tut ir purely coincidental.

Written by: Nicole April 8,2009


**Good Morning** FTU

For this tut you will need working knowledge of PSP.


Supplies:

Tube of Choice: I am using the gorgeous work of Barbara Jensen. You must have a license to use her work. You can purchase one HERE.
Scrap Kit of Choice: I am using the wonderful scrap kit called "Diamonds R 4-ever" By Chingjp. You can get this scrap kit HERE.
Thanks hun!
Font of Choice: I am using Portfolio
Ready? Let's Go!
Open a New raster Layer 700x700 White. We will resize this at the end.
Open the Pink circle frame- resize it by 40% then by 35% then again by 70%. Duplicate and place diagonal from each other.
Open the Diamond Frame- Resize by 30% and place on the pink frame layer. Duplicate and place on the other frame layer.
Grab your magic wand and click inside each frame layer and add a paper of choice.
Keep selected and add your tubes in each frame layer.
Open the Glitter and Resize it the size you would like and place it under the frames.
Open Swirl3 and resize it by 30%. Place it on top of the glitter layer. Duplicate-Mirror-Flip. Use your deform tool to set it the way you would like it.
Open Leaves2-Resize 35% then 60% and use your deform tool to make it a bit skinnier and smaller. Duplicate-Mirror-Flip
Open Flower2- resize by 10%, place on tag and Duplicate-Mirror-Flip
Open Flower3-Resize it by 10% then 80%. Place it under the other 2 flowers and in the middle.
Add your Copyright and license information.
Save as png or jpeg.
Your done!
I hope you enjoyed this tutorial. I would love to see your creations. You can send them to me at sexy_nikkib@hotmail.com I would add them to the slide.
Any resemblance to another tut is purely coincidental.
Written By: Nicole April 8, 2009


Tuesday, April 7, 2009

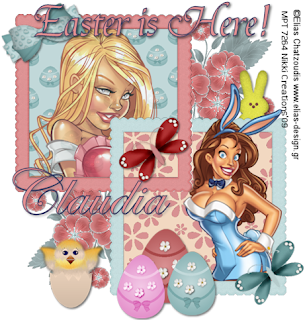
!@! Easter Is Here !@! (FTU)

For this Tutorial you will need working knowledge of PSP.
Supplies:
Tube of Choice: Elias Chatzoudis. You need a license in order to use his work. You can purchase one HERE.
Scrap Kit of Choice: I am using the beautiful FTU Scrap Kit called "Easter" By Claudia. You can find her kit HERE.
Thanks hun!
Font of Choice: I am using Edward Script IT
Ready? Let's Go!
Open a New Raster Layer 650x650 white
Open Frames 3 and 4 from the scrap kit. Resize them by 75% and paste them on your canvas. Position them diagonally from each other.
Grab your magic wand and click inside a frame- Add a paper of choice- Selections-Invert-Delete-Selections-None. Repeat this step for the next frame.
Highlight one Frame- Select All- Float- Defloat. Now Highlight the other frame layer and delete part of the frame so it looks like your frames link together.
Open Flower1- Place it behind the frame layers and duplicate- Mirror-Flip.
Open Bow1- Resize by 50% and place where you would like it.
Open Butterfly 1 and 2. Resize them by 60% and place them on your tag.
Open Easter Egg 1 and 2 and resize them by 60%. Placing them where you would like them.
Open Easter Chick and Resize it by 50% and place it in the left corner.
Open Easter Peep and resize it by 60% placing it in the right corner.
Add your copyright and license information.
Save as png or jpeg
Your Done!
I hope you liked this tutorial. I would love to see your creations. You can email them to me at sexy_nikkib@hotmail.com and I will add them to the slide show.
Any resemblance to another tut is purely coincidental.
Written By: Nicole April 7, 2009

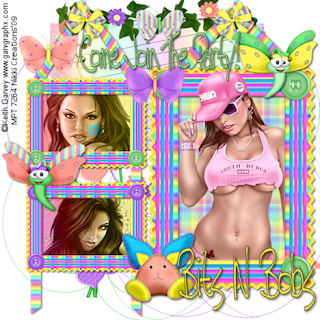
Come Join The Party (FTU)


For This Tut You Will Need Working Knowledge Of PSP.

Supplies:
Tube of Choice: I am using the wonderful work of Keith Garvey. To use his work you will need a license. You can purchase one HERE.
Scrap Kit of Choice: I am using the fabulous FTU Scrap Kit called "BNB-hippity-hop" by Bits N Bobs. You can find the kit HERE.
Thanks hun!
Font of Choice: I am using Tall Paul

Ready? Let's Go!

Open a New Raster Layer 650x650 white.
Open Frame 1 and Frame 2. resize them both by 70%. Place Frame1 on the left side of the canvas and Frame2 on the Right.
Open Frame Hang and resize it by 40%. Place it under the Frame2 Layer
Grab your Magic Wand and click inside the first square on Frame1. Selections-Modify-Expand by 3 Add a paper of choice Selections-Invert-Delete-Select-None
Do this for the other square and the Frame2 Layer
Add both Doodles behind the Frame Layers. Place as you would like them.
Ass Journal2 behind the frame Layers as well.
Open bow3 and Resize by 50% then 50% again. Place on the tag and Duplicate-Mirror.
Now go Back to Frame1. Magic wand again in the first square. Add a tube of choice- Selections-Invert-Delete
Do this for the next square and in Frame2.
Drop shadow the Frame Layers.
Add the Rabbit1-Resize by 50% and place on the tag.
Add both Dragonfly's-Resize them by 50% and place them on the tag.
Add all 3 Butterfly's- Resize 2 and 3 by 50% and #1 by 40%. Place them on your tag.
Add a saying to your tag.
Merge your tag down and add your Copyright and license information.
Resize the tag by 80%.
Save as png or jpeg.
Your Done!

I hope you enjoyed this tutorial. I would love to see your creations. You can send me them and I will place them on the slide.

Any resemblance to another tut is purely coincidental.

Written By: Nicole April 7,2009


Monday, April 6, 2009

~!~Believe In Yourself~!~ FTU


For this tutorial you will need working knowledge of PSP!
Supplies:
Tube of Choice: I am using the wonderful artwork by Joel Adams. You need a license to use his art. You can purchase one HERE.
Scrap Kit of Choice: I am using the beautiful FTU kit called "ML-Springtime" By Malu. It is her contribution to the Spring Blog train. You can get it HERE.
Thanks Hun!
Mask of Choice"
I have supplied the mask I used. If this is yours please let me know and I can credit you or take it down. You can get it Here.
Font of Choice: I am using Smudger LET


Ready? Let's Go!

Open a new raster layer 600x600 White
Open Frame2- Grab your Magic Wand- Selections-Modify-Expand by 4. Copy and paste a paper of choice. Selections-Invert-Delete-Selections- Invert, Add a Tube of Choice. Selections-Invert-Selections-None
Open Element07-Use your deform tool to resize and paste where you would like it.
Open Element17- Resize by 60% and paste in the left corner.
Open Element16- Resize by 50% and paste it in the right corner.
Open Element 22, 23, and 24 and Resize them by 30%. Rearrange them on your tag as you would like them
Open Element18- Resize by 40% and place where you would like it.
Open Element03- Copy and paste on your tag and Flip it. Place it under your flowers.
Open Element02- Resize by 60% and place under your flowers but over the rainbow.
Open Element13- resize by 40% and place where you would like it.
Open your mask layer in PSP.
Open a paper of choice and go to Layers-New Mask Layer-From Image- Find your mask. Merge-group.
Merge All Down
Save as png or jpeg and your Done!

I hope you enjoyed this tut. I would love to see your creations, you can email me them at sexy_nikkib@hotmail.com and I will post them in the slide show.

Any resemblance to another tut is purely coincidental.

Written By: Nicole
April 6,2009

Wednesday, April 1, 2009

Spring Friendships of Love
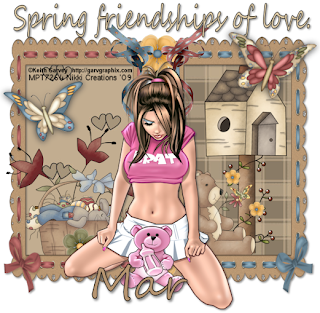

For this tut you will need working knowledge of PSP.
Supplies:
Tube of Choice: I am using the fabulous work of Keith Garvey. In order to use his art you need al license. You can get one Here.
Scrap Kit of Choice: I am using the beautiful FTU Scrap Kit called "Angels Watching Us" By Mar. You can find the scrap kit Here.
Thank you Mar!
Font of Choice: I am using Segoe Script
Ready? Let's Go!
  • Open a 700x700 Raster Layer White, don't worry we will resize it at the end.
  • Open 2 Frames from the Scrap kit. resize them by 70% and copy and paste them on your canvas. Using your deform tool, Size them to the size you want.
  • Grab your Magic Wand and click inside the first Frame layer. Add a paper of choice. Selections-Invert-Delete-Selections-None
  • Do that same step for the other frame layer using a different paper!
  • Open 2 bows. Resize them by 15% and paste them on the corner of the frames.
  • Open Flower 16 and 18. Resize them by 15% Copy and paste them on your tag.
  • Open the bear element. resize the bear by 20% and paste him in one of the frames.
  • Open the Birdhouse on the stick (element #36) and resize it by 20%. Place it under the bear.
  • Open the Rabbit in the basket (element #34) and resize him by 20%. Place him in the other frame layer.
  • Open the Big Flower Pot with Flowers (Element #35) Resize it by 30% and place it behind the rabbit and basket.
  • Open your tube and place it in the middle of your tag.
  • Add a drop shadow to all your frames and anything else you would like to do.

Add your Copyright and license information.

Save as jpeg or png and Your Done!

I hope you enjoyed this tutorial. I would love to see your creations you can email me them at sexy_nikkib@hotmail.com. I will add them to the slide show.

Any resemblance to any other tut is purely coincidental.

Written By: Nicole April 1, 2009

@!@Happy Easter@!@ FTU

For this tut you will need working knowledge of PSP.
Supplies:
Tube of Choice: I am using the wonderful work of Elias Chatzoudis. To use his work you need a lisence. You can get one HERE.
Mask of Choice: I am using the beautiful WSL_mask143 by Chelle. You can get it HERE.
Thanks hun!
Scrap Kit of Choice: I am using the gorgeous FTU Scrap Kit called "SD Spring Time" By Doris. You can get it HERE.
Thanks Hun!
Font of Choice: I am using Quiggly Wiggly.
Wordart By Me, you can get it HERE.
Ready? Let's Go!
  • Open a new Raster Layer 600x600 white
  • Open frame1- Resize 20% then 70%, Copy and paste on your canvas.
  • Grab your Magic Wand and click inside your frame. Selections-Modify-Expland by 4. Open a paper of choice resize by 70%, copy and paste your paper on your canvas. Selections-Invert-Delete-Selections-None
  • With your magic wand click inside the first square on your frame. Selections-Modify-Expand by 2 and add your tube of choice.
  • Repeat the above step for your second square.
  • Add a standing tube beside the frame. (See my tag for reference)
  • Add the wordart by me.
  • Open the Butterfly4 element.-Resize by 40% then 70%. Colourize if you wish and place on tag.
  • Open Flowers2 and resize by 20% place behind the standing tube. Duplicate and Mirror it.
  • Open Flowers1 and resize it by 20% place it in the middle of the other flowers.
  • Merge just the flowers down-Mirror- and place the duplicated bunch behind the frame layer.
  • Open the Sun and resize it by 30%. Add a drop shadow to it and place it behind the wordart.
  • Open your mask layer in PSP. Open Paper10 and colourize if you would like. Resize it by 85% and place it on your tag above the background layer. Layers-New Mask layer-From Image-Find your mask and click ok. Merge-Group. If it isn't dark enough for you just duplicate it until it is dark enough.
  • Add your copyright and lisence information and save as png or jpeg and your done!

I hope you enjoyed this tutorial. I would love to see your creations you can email them to me at sexy_nikkib@hotmail.com and I will place them in the slide show.

Any resemblance to another tut is purely coincidental.

Written By: Nicole April 1, 2009

Tuesday, March 31, 2009

~*~Spring Time~*~ FTU


To do this tut you will need working knowledge of PSP.
Supplies:
Tube of Choice: I am using the wonderful artwork of Caron Vinson. To use his work you need a license. You can get one HERE.
Scrap Kit of Choice: I am using the beautiful FTU Scrap Kit called "Into Spring" By Bel Vidotti. You can find it on her site HERE.
Thank you hun!
Font of Choice: I am using Edwardian Script ITC.
Mask of Choice: I am using the wonderful work of Vix. Vix_Mask223. You can get this mask HERE. Under Goodies.
Thank you hun!
Ready? Let's Go!
  1. Open New Raster Layer 600x600 white
  2. Open the Into Spring Window. Resize by 75% and paste on canvas.
  3. Grab your magic wand and click inside your frame layer. Selections-Modify-Expand by 4. add a paper of choice. Selections-Invert-Delete-Selections-Invert. While it is still selected add a tube of choice. Selections-Invert-delete-Selections-None.
  4. Add the grass element. Resize by 80%- Place on bottom of window sill.
  5. Add the Rainbow-Resize by 80%- Place on frame. Duplicate- Mirror-Erase parts of rainbow that are on the tube.
  6. Add Tree01- Resize 70% then again by 70%. Give a drop shadow and place on your tag.
  7. Add the Wishing well-Resize by 75% then 80%- Add drop shadow. Place on your tag.
  8. Add Wagon and resize by 60%- Mirror- Place on tag.
  9. Add Flower02- Resize by 40%- Place in the wagon. Duplicate and Mirror.
  10. Add Flower01-Resize by 40% and place in wagon.
  11. Add Bow01- Resize as you would like it and place it on your tag.
  12. Add any other elements that you would like.
  13. Add a paper and open your mask in PSP. Go to Layers-New Mask Layer-from Image-Find Vix_mask223. Merge-Group.

Save as png or jpg and your done!

I hope you enjoyed this tut. I would love to see your creations. You can email me them and I will add them to the slide.

Any other resemblance to another tut is purely coincidental.

Written By: Nicole March 31, 2009

Monday, March 30, 2009

~*~Hope~*~ FTU
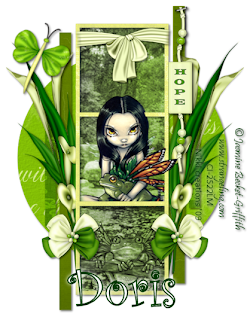

To do this Tut you will need working knowledge of PSP.
Supplies:
1 Image of choice. The water image I am using I can not supply as I do not remember where I got it from. If it is yours please let me know so I can credit you properly.
Scrap Kit of Choice: I am using the Fabulous FTU kit called "Hopeful Green" By Doris. You can find this kit HERE.
Thank you hun!
Template of Choice: I am using Missy's wonderful template #157. You can find the template HERE.
Thank you hun!
Tube of Choice: I am using the gorgeous work of Jasmine Becket-Griffith. In order to use her tubes you must have a license. You can get one HERE.
Font of Choice: I am using Curlz MT
Ready? Let's Go!
  1. Open template in PSP ~Shift~D~Delete original template and delete copyright info off the duplicated template.
  2. Highlight the background layer. Go to Image~Canvas Size~ 650x650
  3. Highlight the Circle Layer~ Select All~Float~DeFloat~ add a paper of choice ~Selections~Invert~Delete~Select~None. Add a Drop shadow.
  4. Repeat step 3 for all the other layers. Delete the heart layer.
  5. Highlight Raster 4~ Magic Wand inside the frame layer~Selections~Modify~Expand by 6.
  6. Add the image your going to use for your background. Set it to Luminance.~Selections~Invert~Delete~Selections~Invert~ Keep selected and add your Tube to your tag.
  7. Add Ribbon3~Use your deform tool to fit into place at the top of the frame.
  8. Add Calla Lillies~Resize by 75%~Use deform tool to fit on the side of the frame~Duplicate~Mirror.
  9. Add bow3~Resize 30%~Place on tag~Duplicate~Mirror.
  10. Add Dragonfly~Resize 50% then 70% and place where you would like it.
  11. Add Hope Bead~Resize by 54%~Place on the Right side.
  12. Add any other elements you would like.
  13. Add your correct Copyright information and license.
  14. Save as PNG or JPEG.

Your Done!

Thank you for trying my tut. I hope you enjoed it. I would love to see your creations. You can email them to me and I will add them to the slide.

Any resemblance to another tut is purely coincidental.

Written By: Nicole March 30, 2009

Thursday, March 19, 2009

Sweet Memories Of You FTU


For this tutorial you will need working knowledge of PSP.
Supplies:
Scrap Kit of Choice: I am using the gorgeous ftu kit called "EbonBerry", by Jane. You can get it HERE. Thank you hun!
Tube of Choice: I am using the very cute work of CEI. You need a license to use CEI's work. You can get one HERE.
Mask of Choice: I am using the beautiful mask called zuzzanna_mask24, by Zuzzanna. You can get her masks HERE. Thank you Hun!
My supplies: SweetMemories Wordart. You can download it HERE.
Font of Choice: I am using Pristina.
Ready? Let's Start!
Open a New Layer 600x600 white. We will resize later.

Open Frames 1,2, &3 from the scrap kit. Resize all by 75%. Copy and paste on to your canvas. Using your deform tool to make them a bit smaller on the sides. Place them side by said on the canvas.
Open the chain element. Resize by 75%, Copy & Paste on your canvas. Deform tool again to fit on the frame. Layers-Duplicate-Image-Mirror add a drop shadow to the chains.

Open Bow 6 & 7. Resize by 40% then by 50%. Add a drop shadow of 0 0 100 20 white. Copy & Paste them to your canvas. Place the red one on the top of one chain and the black one on the bottom. Merge these two layers down. Layers-Duplicate-Image-Mirror-Image-Flip.
Using your Magic Wand tool, click inside the first frame layer. Selections-Modify-Expand by 4.
Choice a paper of choice, Resize by 70%, Copy & Paste it on your canvas, Selections-Invert-Delete-Selections-Invert. While still selected add a tube of choice. Selections-Invert-Delete-Select-None
Do this step for all three frame layers using different papers or the same. Add a drop shadow of choice.
Copy & Paste another Paper of choice over the white background layer. Open your mask in PSP -Layers-New Mask Layer- from Image- find your mask and make sure your source and invert mask data are checked.-Merge-group. Use your Deform tool to make the mask layer fit around your frames.
Open SweetMemories Wordart and paste at the top of tag.
Resize your tag by 85%
Add your correct copyright and license information.

Add your name.
Save as png or jpeg.
Your Done!
Thanks for trying my tut! I hope you enjoyed it. I would love to see your creations. You can email them to me and I can add them to the slide show when I have it going.
Any resemblance to another tutorial is purely coincidental.
Written By Nicole. March 19/09

Monday, March 16, 2009

~*~Dreamy Dayz~*~ FTU



For this tutorial you will need working knowledge of PSP.

Supplies:

Scrap Kit of Choice: I am using the beautiful FTU Scrap Kit called "Aged Romantic" By Jane. You can find it HERE.

Thank you hun!

Tube of Choice: I am using the beautiful work of Lindsey Cormier. You need a license to use her work. You can purchase on HERE.

Font of Choice: I am using ParkAvenue BT

Ready? Let's go!

Open a New Layer 500X500 white.

Copy and Paste Image22- Resize by 75%

Take your magic wand and click inside your frame. Selections-Modify-Expand by 5

Copy and paste paper5-Selections-Invert-Delete-Selections-Invert keep selected

Add a tube of choice. Selections-Invert- Delete-Selections-None

Close your white background layer. Then merge Visible your frame layers.

Open your background layer again.

Make sure your on your frame layer-Layers-Duplicate 2x.

On the origional frame layer-Adjuse-Blur-Gaussian Blur-17

On frame layer copy1- Image-Free Rotate-left 15. Image-Mirror. Merge-Down-Lower transparency of these two frames to 50.

Open Doodle1-Place it under the frame layers to the left corner-Duplicate-Image-Mirror-Duplicate-Image-Flip-Duplicate-Image-Mirror. Merge all four of these down. Add a drop shadow.

Open Star2- Place on the bottom left of your frame layer. Resize by 60% 2x. Add a drop shadow.

Add your name

Add the correct copyright and license information.

Save as png or jpeg.

Your done!

Thank you for trying my tut. I hope you liked it. I would love to see your creations you can email me them and I will add them to the site.

Any resemblance to another tut is purely coincidental.

Written By: Nicole March 16/09

Sunday, March 15, 2009

Most Wanted Girls FTU


To do this tut you must have working knowledge of PSP.
Supplies:
Scrap Kit of Choice: I am using the beautiful FTU Scrap Kit by Jane. You can find it HERE.
Thank you hun!
Tube of Choice: I am using the wonderful work of Michael Landefeld. You need a license to use his work. You can get one HERE.
Mask of Choice: I am using the wonderful mask called zuzzanna_mask49 by Zuzzanna. you can find this mask HERE.
Thanks hun!
Font of Choice: I am using John Handy LET.
Ready? Let's Go!
Open a new layer 500X500 white
Open brokenrodeo Tri-frame2 and resize it by 60%, Copy and Paste on canvas.
Magic wand inside one frame, Selections-Modify-Expand by 4, Copy and paste paper9, selections-invert-delete-selections-none
Do this for all three frames. Make sure all paper layers are under frame layer.
Magic wand again inside one frame- Copy & paste one tube of choice, Selections-invert-delete-selections-none
Do the same for all three frames with different tubes. Lower transparancy to 50% for all tubes. make sure they are under frame layer.
Open a paper of choice and place it above the white background. Open your mask layer in psp. Layers-New Mask Layer- find zuzzanna_mask49 and make sure source and Invert mask data are checked off. Merge-Group-Duplicate-and Mirror
Open the Silver badge and Silver Star elements. Resize them and place them where you would like them. add a d/s
Add your name to your tag
Add correct copyright and license information.
Save as png. or jpeg and Your done!
Thank you for trying my tut. I hope you liked it.
Any resemblance to another tut ir purely coincidental.
I would love to see your results. You can email them to me and I will post them up on here!
Written by Nicole March 15/09

My Header Tag Tutorial


As requested here is the Tutorial to the Tag I made for my header.
For this Tutorial you will need working knowledge of PSP.
Supplies:
Scrap kit of Choice: I am using the fabulous FTU scrap kit by Bel Vidotti called "Alone".
You can find it HERE.
Thanks Hun!
Tube of Choice: I am using the wonderful work of Jamie Kidd. You need a license to use Jamie's art. You can get one HERE.
Mask of Choice: I am using the wonderful work of Zuzzanna's, called zuzzanna_mask32. You can find the Mask HERE.
Thank you hun!
Ready? Let's Go!
Open a New image 500x500 white
Open the Alone51 frame and copy and paste on your canvas.
With your Magic wand click inside your frame layer. Copy and paste a paper of choice. selections-invert-delete-selections-invert
Grab a tube of choice and copy and paste inside the frame above the paper layer Selections-Invert-delete-selections-none
Open the Alone26 element and resize by 85% then b 90%- Place on the side of the frame-layers-duplicate-Image-Mirror
Open the Alone31 and Alone32 elements. Resize them by 20%. Arrange them as you would like them.
Open the Alone14 element and resize by 40%. Place at the top left hand corner of the frame.
Open the Alone17 element and resize by 40% and mirror. Copy and paste it on your tag on the right hand corner of the frame.
Open your Mask in psp.
Open a paper of choice. Copy and paste it over the white background layer. Layers-New mask layer-from Image- find zuzzanna-mask32 Source checked and invert mask data checked.
Merge-group.
Add your name
Add your correct copyright and license information.
Save as png or jpeg.
Your done!
I hope you enjoyed this tutorial. Any resemblance to another tut is purely coincidental. I would love to see your creations. You can email them to me and I will post them up on the site.
Thank you for trying my tut.
Written by: Nicole March 13/09


Friday, March 13, 2009

~*~Angel~*~ (FTU)
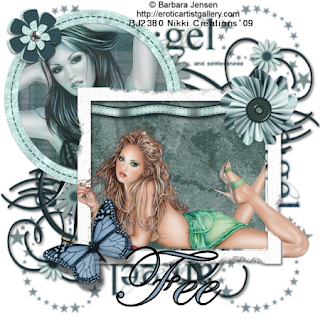

For this tutorial you need working knowledge of PSP.
Supplies:
Scrap Kit of Choice: I am using the beautiful FTU scrap kit called "Eternal" By Scrappy Expressions. You can find it HERE.
Thanks Hun!
2 Tubes of Choice: I am using the fabulous work of Barbara Jensen. You need a licence to use her work. You can get one HERE.
Mark of Choice: I am using the fabulous Vix_Mask03 by Vix. You can get it HERE.
Thank you hun!
Ready? Let's Go!
Open a New Layer 500x500
Copy and Paste the square frame from the scrap kit. Resize it by 85%.
Copy and Paste the circle frame layer and resize it by 85%.
Place it under the square layer to the left hand corner.
With your magic wand click inside the circle frame. Selections-Modify-Expand by 5. Open a paper of choice. Selections-Invert-Delete. Selections-Invert. Open a tube of choice and place inside the circle frame. Selections-Invert-Delete-Selections-None
Repeat this step for the square layer but expand by 8.
Copy and Paste Flower_1 from the scrap kit. Resize by 80%, Place it on the circle. Add a Drop Shadow.
Copy and Paste Accent_1, Place it above Raster 4. Layers-Duplicate-Image-Flip-Image-Mirror. Add a drop shadow.
Open Flower_2 Place it where you would like it on the square frame.
Open the Ribbon. Use your deform tool to resize it the way you would like it. Place on your tag where ever you would like it.
Open Butterfly Tube. Resize by 60%-Colourize-Hue 147, Saturation 73. Place it where you would like it and add a drop shadow.
Open another paper of choice. Place it above the white background. Open your mask in PSP. Layers-New Mask Layer-From Image. Find Vix_Mask03 check off source luminance, make sure Invert data mask is unchecked. Click ok. Layers-Merge-Group.
Add your name
Add your correct copyright and license number
Save as png. or jpeg.
Your done!
Thank you for trying my tut, I hope you enjoyed it! I would love to see what you make. You can email me your results and I will post them on here @ sexy_nikkib@hotmail.com
Any resemblance to another tut is purely coincidental.

Written By: Nicole March 13/09

Wednesday, March 11, 2009

Spring Wishes (FTU)
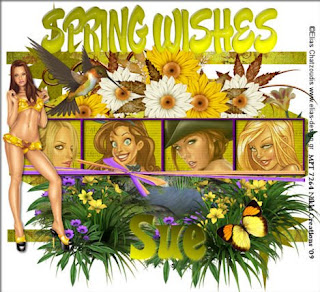

For this tutorial you will need working knowledge of PSP.
Supplies:
Scrap Kit of choice: I am using the gorgeous FTU scrap kit called "Spring Wishes" by Doris Nilsa. Which you can find HERE.
Thanks hun wonderful scrap kit!
Tube of Choice: I am using the beautiful work of Elias Chatzoudis. You need a licence in order to use his work. You can purchase his work HERE.
Template is made by me. You can download it HERE.
Font: I am using Heavy Heap.
Ready? Let's get started!
Open the template. ~Shift D~ Close origional.~delete Credit.
Highlight Raster 6~ Select all~Float~Defloat~Copy and paste Paper1 (Or any paper you wish to use)~Selections~Invert~Delete~Selections~None.
Repeat above for all raster layers with different papers.
Now Highlight the frame layer. ~Click inside each square with your magic wand. ~Selections~Modify~Expand by 5~Ok. Copy and paste a layer you will want as the background for you frames.~selections~Invert~Delete~Selections~None
Next With your magic wand click inside one of the sqares for your frame. Selections ~Modify ~Expand by 1~Copy and paste a tube of choice~Selections~Invert~Delete~Selections~None
Repeat this step for the other 3 squares.
Add a drop shadow to your frame layer.
Make sure your tube layers are under your frame layer.
Open the Pond element from scrap kit~Resize by 80% and place it under raster 4.
One the Daisies and resize by 80%. Place them above the pond layer.
Open Ribbon4~Use your deform tool to resize it and place it where you would like it.
Open Spring Wishes Wordart from the scrap kit and place it at the top on the tag.
Add any other elements you would like and place them umongst your tag.
Add the correct copyright and licence information.
Add your name with a drop shadow.
Save as png or jpeg.
Your Done!

I hope you enjoyed this tutorial.
Any resemblance to any other tutorial is purely coincidental.
Thank you for trying my tut. I would love to see your creations!
Written by Nicole March 11, 2009

Sunday, March 8, 2009

Beauty Lies Within (FTU)
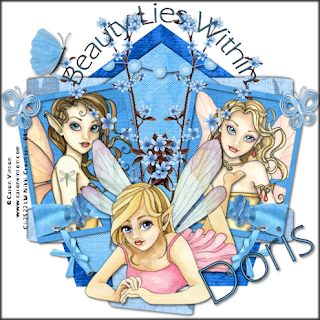


For this Tutorial you must have working knowledge of PSP.
Supplies:
Tube Of Choice~ I am using the fabulous work of Caron Vinson. You must have a licence for his work. You can get one HERE.
Scrap Kit Of Choice~ I am using the beautiful work of Doris Nilas. You can find her FTU scrap kit called "Blue Feelings"at Scraps Dimensions HERE.
Thank you hun!
Template of Choice~ I am using the fabulous template51 by Aquarebel315. You can find it on her site HERE.
Thank you hun!
My suppies BeautyLiesWithin Wordart. You can find it HERE.
Font of Choice~ I am using Eras Light ITC
Ready? Let's Go!!
Open Template51 ~Shift D~ Close Origional~Delete Credit.
Highlight Raster 3~Select all~ Float~ Defloat. Copy and paste a paper of choice.~ Selections~ Invert~ Delete~ Selections~None. Add a drop shadow of choice on all layers.
Repeat above for all layers.
Open Branch from scrap kit. Resize 80% Place it in between the frame layers and then go to Layers~Duplicate~Image~Mirror.
Highlight frame layerMagic wand inside one of them.~Selections~Modify~Expand by 5 ~Copy and paste your tube of choice~ Selections~Invert~Delete. Do the same for the other frame layer.
Add a drop shadow of choice. Place your tube layers under your frames.
Open another tube and place it on the middle bottom of the tag.
Open BUTTERFLY1 resize 40% then 50%. Copy and paste the Butterfly where you would want it.
Open any other elements you would like and arrange them on your tag.
Add Your Name
Add the correct Copyright and Licence information.
Save your tag as png or jpeg.
Your Done!
I hope you enjoyed my tutorial. I would love to see your creations!
Any resemblance to another tutorial is purely coincidental.
Written by Nicole March 8, 2009.

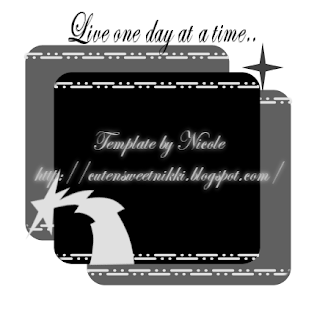
Template#2


You can download this template HERE.
Hope you enjoy it! If you use this template please credit back to my site for the download. Thnk you.
~Nikki~

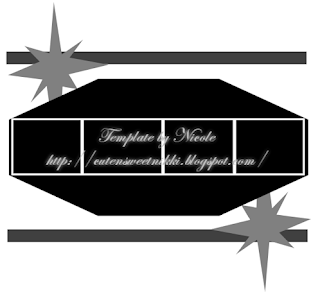
Template #1


My first attempt at making a Template. Hope you enjoy it! If you use this template please credit back to my site for download. Thank you!
You can download it HERE.

~Nicole

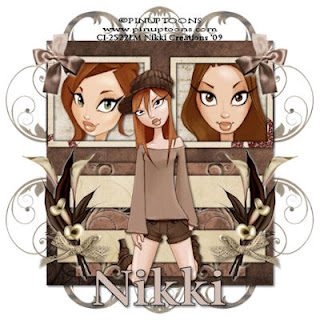
Beautiful (FTU)


For this Tutorial you must have working knowledge of PSP.
Supplies:
Tube of choice: I am using the wonderful work of Pinuptoons. You must have a licence to use this artist. Which you can purchase HERE.
Scrap Kit of choice: I am using the gorgeous FTU scrap kit called "Beautiful" by Bel Vidotti. You can find it HERE.
Thank you hun!
Template of choice: I am using the wonderful Template17 by Aquarebel. Which you can find HERE.
Thank you hun!
Font of choice: I am using Byington
Drop Shadow used 2 2 60 5 black repeat with -2 -2 60 5 black
(as well as 2 2 60 5 white near the end)
Ready? Let's go!
  1. Open template17 - Shift D - Close original- Delete credit.
  2. Highlight Raster5 - select all- float - defloat - paste a paper from scrap kit (i used paper02) - selections- invert- delete- selections- none add drop shadow - delete original layer
  3. Repeat step 2 for other raster layers using different papers
  4. Click inside your frame layers with your magic wand. Selections-Modify-Expand by 8-OK
  5. Now copy and paste your tube of choice in each frame. -selections- Invert -delete then place under frame layer.
  6. Open another tube and place it in the middle (see my tag for placement)
  7. Open Doodle03 and resize by 50% Copy and paste over raster5-Give drop shadow 2 2 60 5 white - layers- Duplicate- Mirror.
  8. Add any other elements you would like.
  9. Resize your tag by 90%
  10. Add your name with drop shadow.
  11. Add correct copyright and licence.
  12. Save as png or jpeg

Your done!

Any resemblance to another tut is coincidental.

Thank you for trying my tutorial! I would love to see your creations!

Written by Nicole March 7, 2009!